HOWTO: Zimbra Collaboration Server 7.2 - Authentication and GAL lookups against FreeIPA.
Provided by Dale Macartney
This document is written as an integration document to configure IPA as an Authentication Source as well as a Directory source for an already existing Zimbra installation.
This document is not intended as a walkthrough on how to install and configure Zimbra Collaboration Server.
This document was written and tested using Red Hat Enterprise Linux 6.2 x86_64 running Zimbra Collaboration Server 7.2 (Network Edition)
For the purpose of this document, the following information is given
Servers:
IPA Server = ds01.example.com
Zimbra Server = zimbra03.example.com
IMPORTANT
Please note, that by adding FreeIPA as the external authentication backend, the username “admin” will clash as both IPA and Zimbra use an admin account.
you MUST set the following so that, should LDAP authentication fail for what ever reason, you will be able to still login with the local admin account.
If you do not do this and you lose LDAP authentication, you will not be able to log in as the Zimbra Admin user.
[root@zimbra03 ~]# su -l zimbra
[zimbra@zimbra03 ~]$ zmprov modifydomain example.com zimbraAuthFallbackToLocal TRUE
[zimbra@zimbra03 ~]$
Prerequisite:#
We will need to create a bind account for Zimbra to authenticate to IPA as a service account.
To do this, create an ldif file detailing your service account. I used the following, saved as zimbra.ldif
dn: uid=zimbra,cn=sysaccounts,cn=etc,dc=example,dc=com
changetype: add
objectclass: account
objectclass: simplesecurityobject
uid: zimbra
userPassword: woofwoofimasecretpasswordthatisreallydifficult
passwordExpirationTime: 20380119031407Z
nsIdleTimeout: 0
Save your file, and then import it on your IPA server
[root@ds01 ~]# ldapmodify -h ds01.example.com -p 389 -x -D "cn=Directory  Manager" -w redhat123 -f zimbra.ldif
adding new entry "uid=zimbra,cn=sysaccounts,cn=etc,dc=example,dc=com"
[root@ds01 ~]#
Your service account is now imported
Zimbra Authentication with FreeIPA#
Step 1 :
Log into the Zimbra admin console https://zimbra03.example.com:7071/zimbraAdmin/
See attached screenshot.
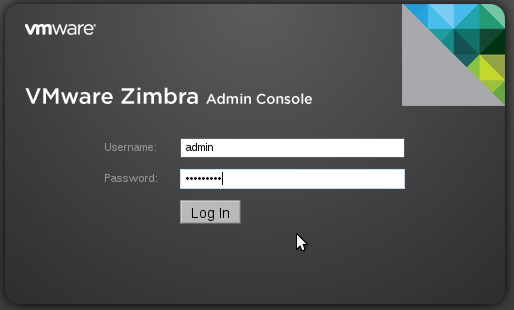
1-AdminConsoleCrop.png#
Step 2 :
Once logged in as the admin user, on the left select domains, then click the domain you wish to add authentication to, and click the Authentication button above it.
See attached screenshot.

2-ZimbraDomainsCrop.png#
Step 3 :
Select “External LDAP”
Enter your IPA server’s host name (mine is ds01.example.com)
Under LDAP Filter, enter “(&(objectClass=inetOrgPerson)(objectClass=posixAccount)(uid=%u))” without the quotes
Under LDAP Search Base, enter “cn=users,cn=accounts,dc=example,dc=com” without the quotes
Then click Next.
See attached screenshot.
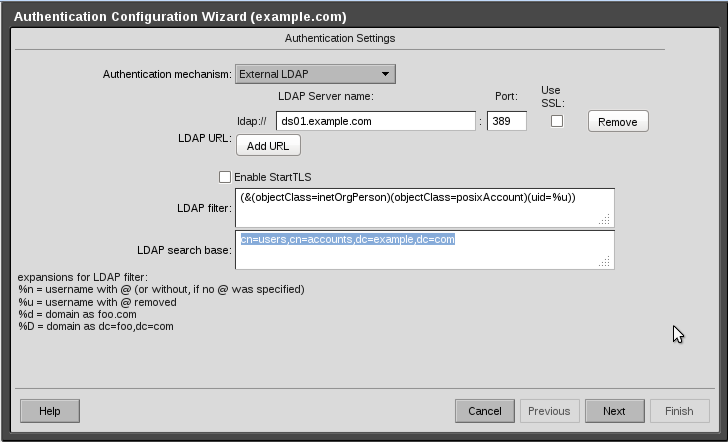
3-AuthenticationConfigurationCrop.png#
Step 4 :
Place a tick in the box next to “Use DN/Password to bind to external server:” and enter your service account details.
Note: the correct value to use is as it appears as the output from your ldapmodify command above.
Click Next
See attached screenshot.
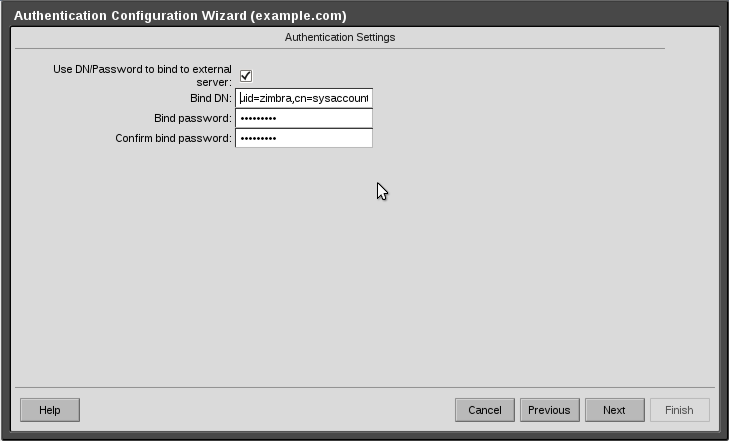
4-AuthenticationConfigurationBindAccCrop.png#
Step 5 :
Here you have the chance to verify your settings to make sure they are working.
Create a test user and enter the username and password in the fields available, and then click the test button
See attached screenshot.
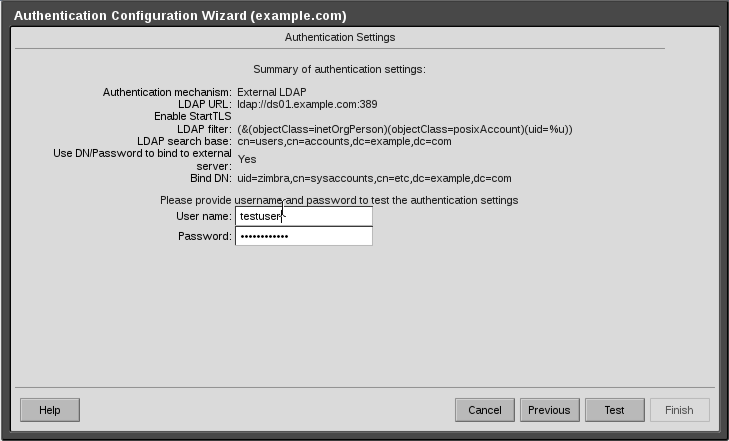
5-AuthenticationConfigurationTestUserCrop.png#
Step 6 :
If everything is behaving as it should, you will see a green message, stating that the authentication process completed suggessfully.
Click next and then finally click finish.
See attached screenshot.

6-AuthenticationConfigurationAuthSuccessCrop.png#
The authentication process is now completed.
See attached screenshot.
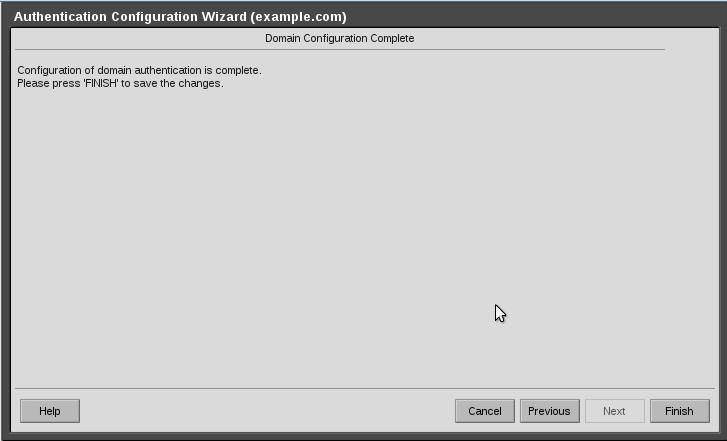
7-AuthenticationConfigurationFinishedCrop.png#
Step 6 :
Now verify your work and mail-enable your test user
Inside the admin console, on the left, select accounts, then click new, account Fill in the relevant details, where the account name matches the username within IPA
Under the “Password” section, enter the External LDAP Account as it would appear from an ldapsearch. My testuser appears as follows uid=testuser,cn=users,cn=accounts,dc=example,dc=com
Click Finish once you have filled in all the details you wish to enter.
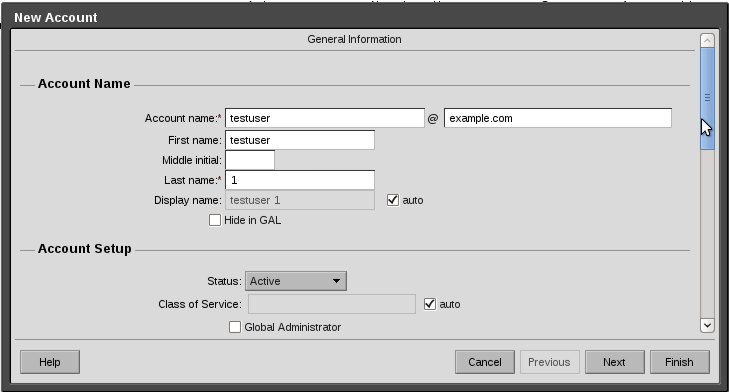
9-AccountsCreateUserCrop.png#
In a new window, open your browser to http://zimbra03.example.com/ enter your IPA username and password and login
Once you have logged in, you will see a new empty mailbox with the test username in the top right corner.
See attached screenshot.
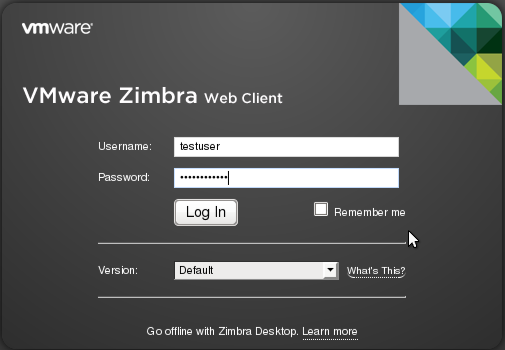
12-WebMailConsoleCrop.png#
Zimbra Global Address List lookups against FreeIPA#
Step 1 :
In the admin console, on the left select domains, then click the domain you wish to edit
Click the “Configure GAL” button and enter the following details
Step 2 :
IMPORTANT, the default port for the ldap search seems to be spefic for Active Directory. Please change the port number to 389
Enter the address of your IPA server under “External Server Name” and set the port to 389
Under “Search Filter”, enter “(&(|(cn=*%s*)(sn=*%s*)))” without the quotes.
Under “Autocomplete Filter”, enter “(|(uid=%s*)(givenname=%s*)(mail=%s*))” without the quotes.
Under “LDAP Search base”, enter “dc=example,dc=com” without the quotes.
Then click next
See attached screenshot.
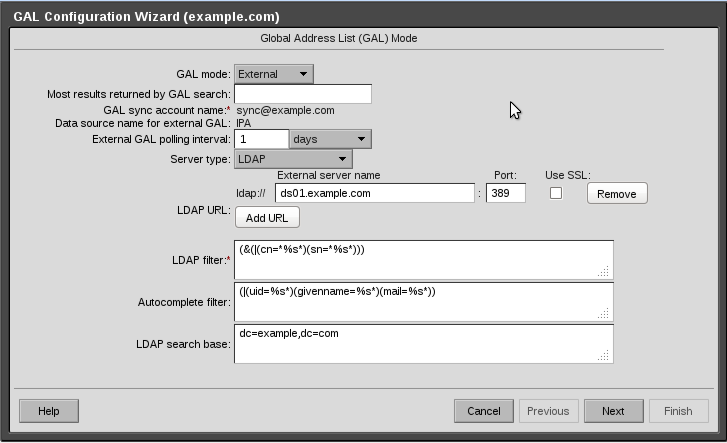
13-GALConfigurationCrop.png#
Step 3 :
Place a tick in the box where is says “Use DN/Password to bind to external server”
Use the service account you created earlier as the bind account. Enter the following “uid=zimbra,cn=sysaccounts,cn=etc,dc=example,dc=com” without the quotes
Enter your service account password.
Click Next
See attached screenshot.
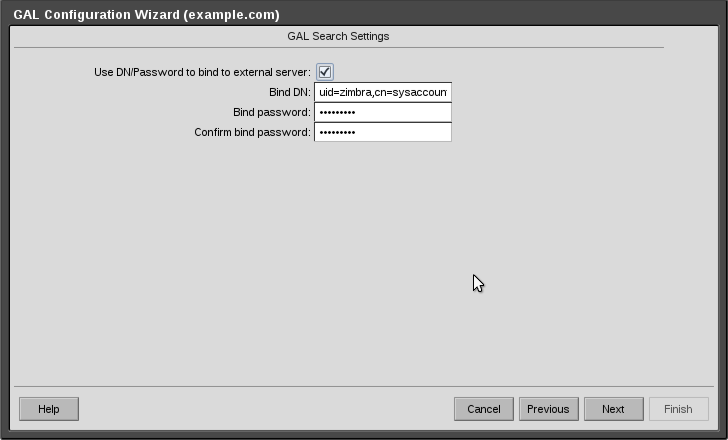
14-GALConfigurationBindAccCrop.png#
Step 4:
By default, there will be a tick alongside “Use GAL search settings for GAL sync”, leave this as is and click next.
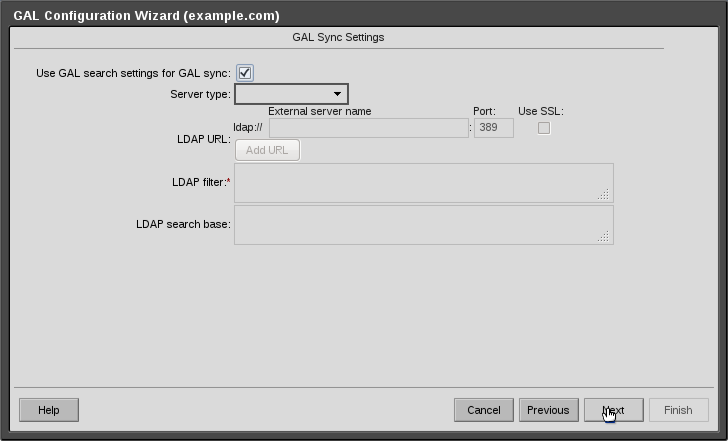
15-GALConfigurationGALSyncCrop.png#
Step 5:
Enter the username or other name for your test user, and click the test button.
See attached screenshot
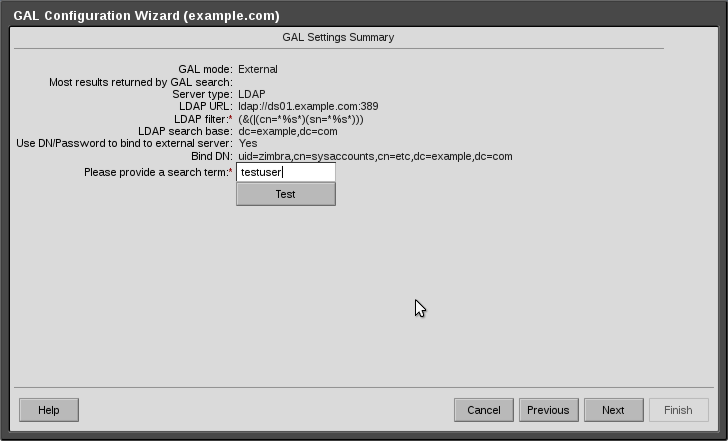
16-GALConfigurationTestUserCrop.png#
If your search is successful, click Finish.
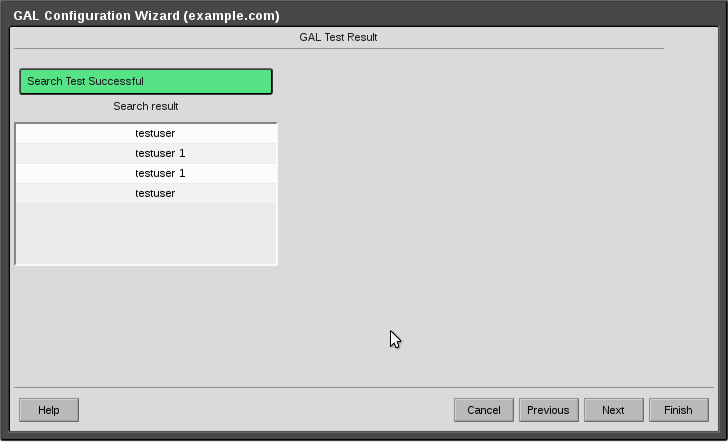
17-GALConfigurationTestSuccessCrop.png#
Your IPA GAL is now implemented.
You can verify the Global Address list by creating a new email and clicking the “To:” button which will allow you to search for your FreeIPA user accounts.